My Boeing 727 project
Re: My Boeing 727 project
very good to see it is a reasonably simple fix, pity about the painting though
Graeme
-

Graeme H - Posts: 1202
- Joined: Thu Jun 05, 2014 12:51 pm
- Location: YBTL TSV
Re: My Boeing 727 project
Here are the other two 727-100s during the painting process; masked and unmasked, ready for decaling after some of the pesky little bits that went wrong are tidied up.
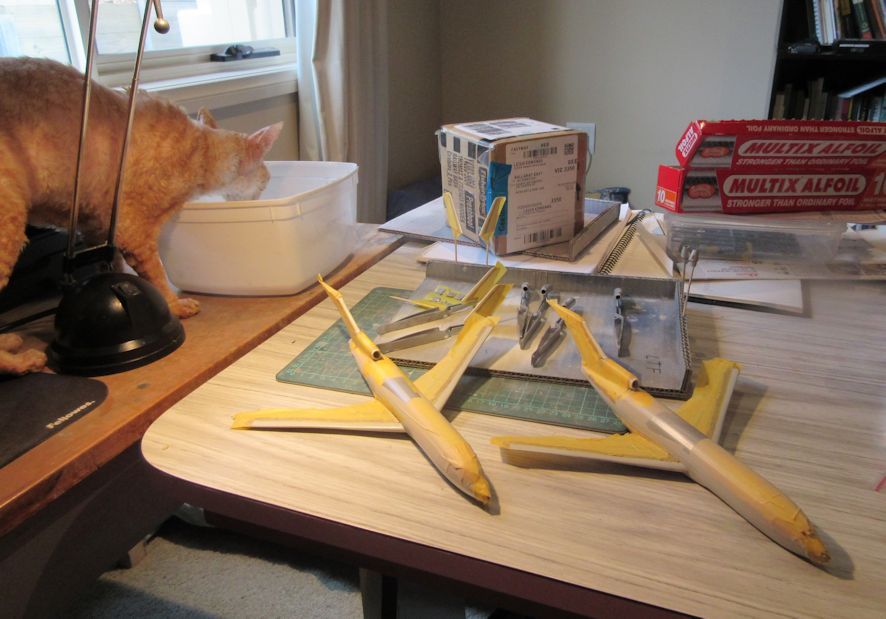
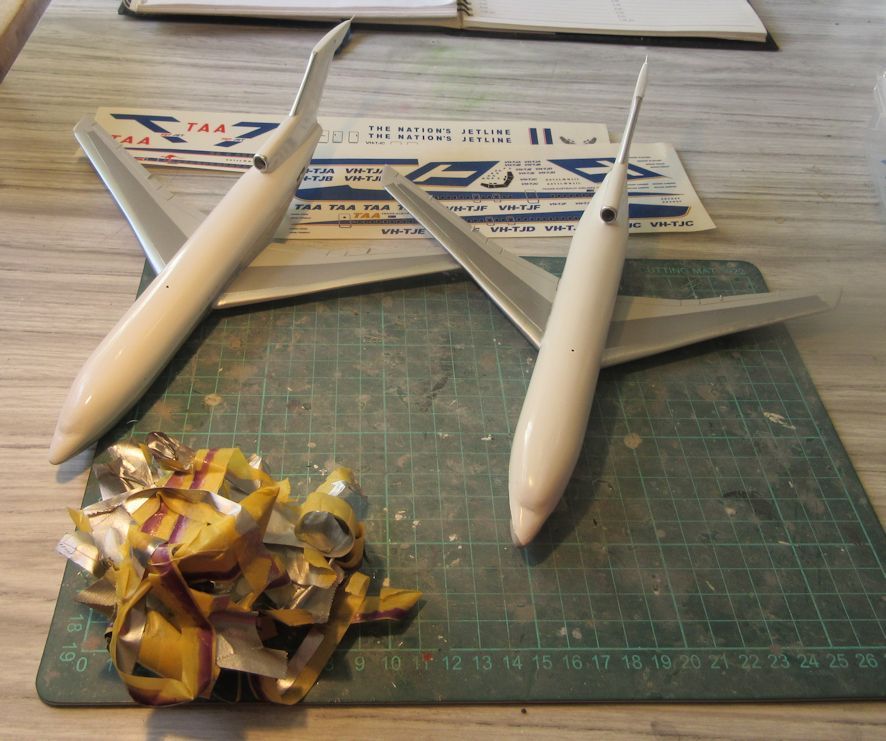
Have I told you how much I hate masking. The best part of a day to get it on, five minutes to paint and ten minutes to unmask. Doesn't seem right. Grrr.
Leigh


Have I told you how much I hate masking. The best part of a day to get it on, five minutes to paint and ten minutes to unmask. Doesn't seem right. Grrr.
Leigh
- F-27pax
- Posts: 973
- Joined: Fri Apr 18, 2014 11:40 pm
Re: My Boeing 727 project
Looking sweet mate 
Head A/CAM Phantom Phanatic, Shit Stirrer and Karma Bus Driver toot fkn toot 
- hrtpaul
- Posts: 4165
- Joined: Sat Apr 12, 2014 10:44 am
- Location: Like I'm gonna tell you lot
Re: My Boeing 727 project
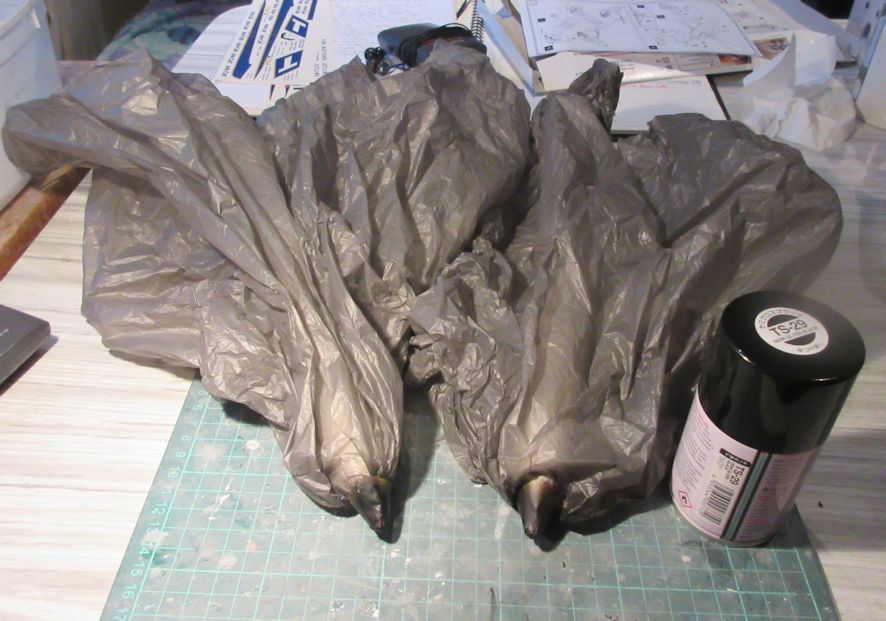
Those plastic bags come in very handy for masking. I use them all the time 
Head A/CAM Phantom Phanatic, Shit Stirrer and Karma Bus Driver toot fkn toot 
- hrtpaul
- Posts: 4165
- Joined: Sat Apr 12, 2014 10:44 am
- Location: Like I'm gonna tell you lot
Re: My Boeing 727 project
Here are a couple of pictures of my TAA 727-100 in the beginnings of what will be the delivery scheme. I worked on this for a few hours yesterday and all I’ve got done so far is the main lines down each side of the fuselage, which is much easier to say that do. If you are not intending to use the Hawkeye sheet to make a TAA 727-100 you might find the following more than a little tedious and you can skip over all the rest of this. On the other hand, if you are thinking of using that decal sheet, these notes might be of some use to you.
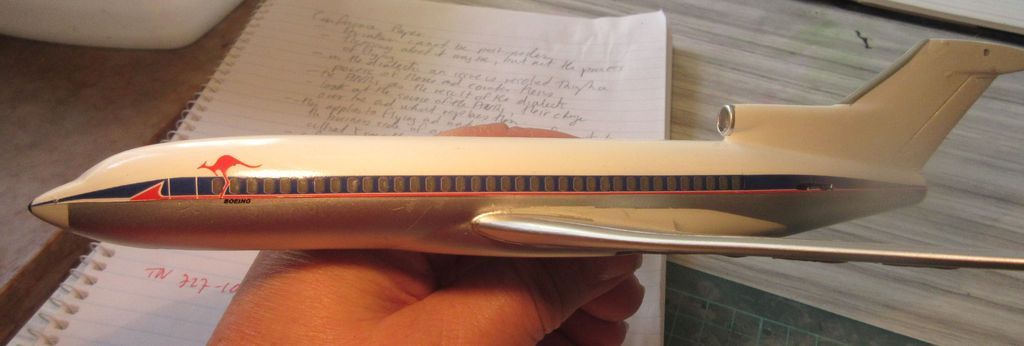
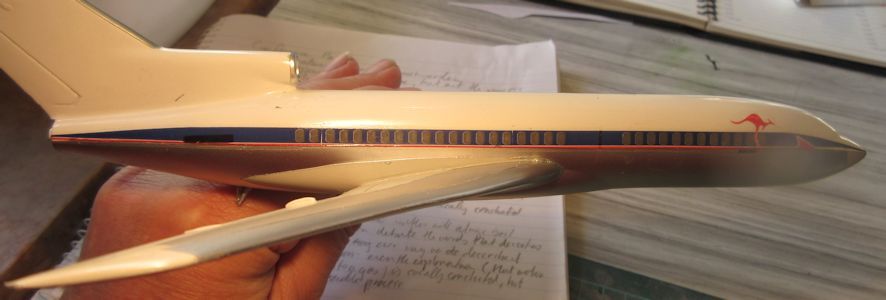
As we discovered earlier, the Hawkeye decals for the delivery scheme seem mostly okay (I haven’t applied them yet so I can’t be sure) but the main paneling down the sides is designed for a 727-200, even though this decal sheet is for VH-TJC which was a -100.
The solution to this is very simple, in theory; all you have to do is leave out some of the windows on the -200 decal to make it shorter to fit a -100 model fuselage. This process is complicated by a couple of factors, mainly the arrangement of the windows on the -200 decal. In theory the decals for a -100 should have 37 windows running without a break and evenly spaced down the port side and 31 down the starboard side with a wide space between the 12th and 13th windows. Unlike the -200 (and later scheme -100s) there were no marking on the fuselage to indicate the emergency exits but they appear on the -200 decal as white lines. This means that only the parts of the decal that don’t have white lines on them can be used. Another confusing matter is that the windows towards the rear on the -200 decal are not evenly spaced, so they cannot be used either.
I started with the port side which seemed to be the simplest side. I cut out all the decal as far back as the line marking the first emergency escape. That makes 26 windows. Then I cut a further eleven windows from immediately behind the second emergency escape window. I made the mistake of cutting at the emergency exits themselves because when I butted the two decals together the space between the two windows was not even with all the spaces between the other windows because of the white line, so I had cut off one of the windows that had insufficient spacing and leave a bit more space (we’re talking fractions of a millimetre here) to get the joint looking right. I decided to make this up by using the last window on the rear part of the decal but when I checked the measurements I found that the final section was too long and had to be cut back if the two sections of decal were to fit perfectly. This left me with 36 and a fraction of the 37th window running down the port side. The tiny bit of window is barely noticeable and it should be hidden by the engine, I bet you wouldn’t notice if I hadn’t mentioned it. There might be a better way of getting the window count on this side perfect but I can’t think of what that better way might be because of the necessity of having even spacing between all the windows down the side.
The starboard side presents it’s own problems but, having compromised on the port side, it is easier for me not to get too concerned about imperfections on the starboard side. Beginning is easy enough because the front of the decal and front of the real thing both begin with 12 windows, so I cut that part out right back to the white line indicating the door and affixed (there’s a word you don’t see these days) that to the model. I also cut out and affixed the rear part of the decal including the two rear-most windows which are evenly spaced. Then there is just the gap between them to fill. Leaving the unevenly spaced window at the rear, I then cut out all the windows up to the emergency exit line and affixed (I’m beginning to like the word) them, butting up to the rear most decal. Then there was only a small gap of 24 mm left to be filled. To fill this gap and match the number of windows accurately I would need another three windows and then the blank space. Unfortunately, after leaving out the door in the middle of the blank area there was not enough blank line and three windows to fill the space, so I had to go for four windows and then blank space instead. This means that there is one more window on the starboard side than there should be and the blank area is one window less than it should be. But since I suspect nobody counts the windows on 1/144 models (probably not even competition judges) I doubt that anyone will be too upset by this slight fiction.
Here is the decal sheet after the windows I needed have been cut out, to give you an idea of what it left.

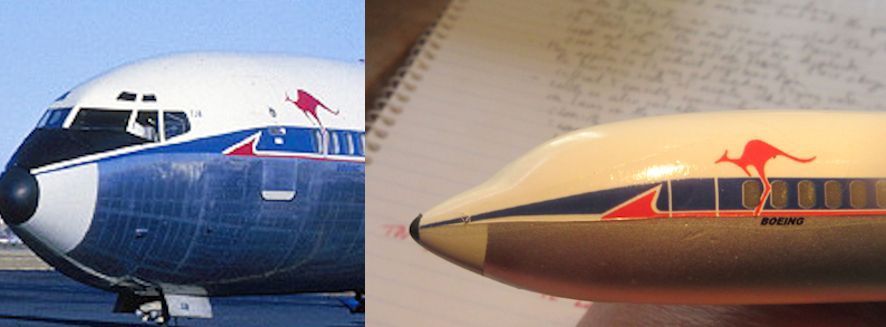
There is one other problem with these decals. The designer did not get it quite right at the front of the decal in a way which is evident from these photos. I didn’t notice this until it is too late, and the problem is partly mine in not getting the demarcation line in quite the right place, so the sliver of white on the model is a bit too obvious to leave as it is. I guess I’ll figure out something, but that was enough brain work for one day.
Leigh


As we discovered earlier, the Hawkeye decals for the delivery scheme seem mostly okay (I haven’t applied them yet so I can’t be sure) but the main paneling down the sides is designed for a 727-200, even though this decal sheet is for VH-TJC which was a -100.
The solution to this is very simple, in theory; all you have to do is leave out some of the windows on the -200 decal to make it shorter to fit a -100 model fuselage. This process is complicated by a couple of factors, mainly the arrangement of the windows on the -200 decal. In theory the decals for a -100 should have 37 windows running without a break and evenly spaced down the port side and 31 down the starboard side with a wide space between the 12th and 13th windows. Unlike the -200 (and later scheme -100s) there were no marking on the fuselage to indicate the emergency exits but they appear on the -200 decal as white lines. This means that only the parts of the decal that don’t have white lines on them can be used. Another confusing matter is that the windows towards the rear on the -200 decal are not evenly spaced, so they cannot be used either.
I started with the port side which seemed to be the simplest side. I cut out all the decal as far back as the line marking the first emergency escape. That makes 26 windows. Then I cut a further eleven windows from immediately behind the second emergency escape window. I made the mistake of cutting at the emergency exits themselves because when I butted the two decals together the space between the two windows was not even with all the spaces between the other windows because of the white line, so I had cut off one of the windows that had insufficient spacing and leave a bit more space (we’re talking fractions of a millimetre here) to get the joint looking right. I decided to make this up by using the last window on the rear part of the decal but when I checked the measurements I found that the final section was too long and had to be cut back if the two sections of decal were to fit perfectly. This left me with 36 and a fraction of the 37th window running down the port side. The tiny bit of window is barely noticeable and it should be hidden by the engine, I bet you wouldn’t notice if I hadn’t mentioned it. There might be a better way of getting the window count on this side perfect but I can’t think of what that better way might be because of the necessity of having even spacing between all the windows down the side.
The starboard side presents it’s own problems but, having compromised on the port side, it is easier for me not to get too concerned about imperfections on the starboard side. Beginning is easy enough because the front of the decal and front of the real thing both begin with 12 windows, so I cut that part out right back to the white line indicating the door and affixed (there’s a word you don’t see these days) that to the model. I also cut out and affixed the rear part of the decal including the two rear-most windows which are evenly spaced. Then there is just the gap between them to fill. Leaving the unevenly spaced window at the rear, I then cut out all the windows up to the emergency exit line and affixed (I’m beginning to like the word) them, butting up to the rear most decal. Then there was only a small gap of 24 mm left to be filled. To fill this gap and match the number of windows accurately I would need another three windows and then the blank space. Unfortunately, after leaving out the door in the middle of the blank area there was not enough blank line and three windows to fill the space, so I had to go for four windows and then blank space instead. This means that there is one more window on the starboard side than there should be and the blank area is one window less than it should be. But since I suspect nobody counts the windows on 1/144 models (probably not even competition judges) I doubt that anyone will be too upset by this slight fiction.
Here is the decal sheet after the windows I needed have been cut out, to give you an idea of what it left.

There is one other problem with these decals. The designer did not get it quite right at the front of the decal in a way which is evident from these photos. I didn’t notice this until it is too late, and the problem is partly mine in not getting the demarcation line in quite the right place, so the sliver of white on the model is a bit too obvious to leave as it is. I guess I’ll figure out something, but that was enough brain work for one day.

Leigh
- F-27pax
- Posts: 973
- Joined: Fri Apr 18, 2014 11:40 pm
Re: My Boeing 727 project
Alright folks. Forget all the advice in my earlier post.
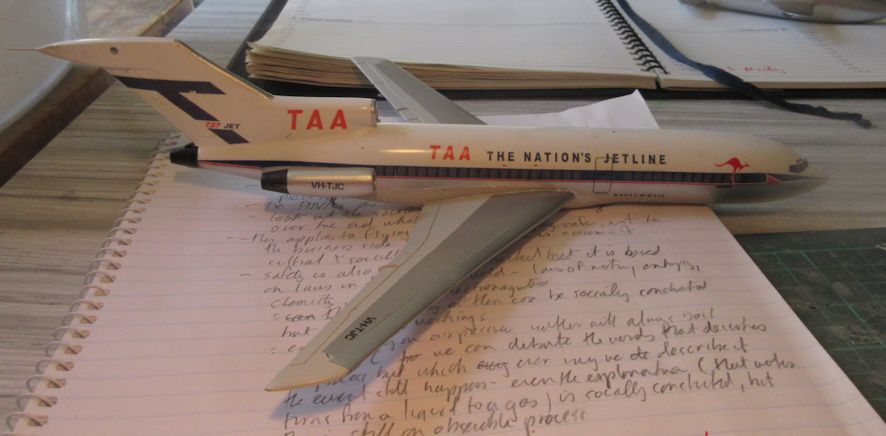
It turned out that many of the other markings on the CDS-002 sheet are so out of scale that I've been driven to the graphics software on my computer to put things to right, as much as possible. Here's a photo of what the model looked like with the major markings applied straight from the decal sheet. The T and TAA on the tail are too big by about ten percent and the logo 'The Nation's Jetline' is too big by perhaps 20 percent. The TAA which goes alongside the logo is the same size where it should be bigger.
Here is what the model would have looked like using the CDS-002 decals:

Given these problems I decided it might be best to modify those markings all on one sheet and that led me to modify the line down the side as well. (Interestingly, by removing ghe white lines and deleting the necessary windows to represent a 727-200 the lines came out to be exactly the right length to fit the Airfix -100 kit. I didn't replace the work I'd already done on this model which is not entirely accurate simply because I'd gone to so much trouble to make it that I didn't feel like removing them.
Here's a photo of the end result:
And here's the sheet with the rescaled images that fit properly:

If you are planning to model a delivery scheme YAA 727-100 I can let you have a PDF of this that you can print out if you have a suitable printer. But you will still need a sheet of CDS-002 for the other bits and pieces.
Having got over this hurdle the model ia almost completed.
Leigh
It turned out that many of the other markings on the CDS-002 sheet are so out of scale that I've been driven to the graphics software on my computer to put things to right, as much as possible. Here's a photo of what the model looked like with the major markings applied straight from the decal sheet. The T and TAA on the tail are too big by about ten percent and the logo 'The Nation's Jetline' is too big by perhaps 20 percent. The TAA which goes alongside the logo is the same size where it should be bigger.
Here is what the model would have looked like using the CDS-002 decals:

Given these problems I decided it might be best to modify those markings all on one sheet and that led me to modify the line down the side as well. (Interestingly, by removing ghe white lines and deleting the necessary windows to represent a 727-200 the lines came out to be exactly the right length to fit the Airfix -100 kit. I didn't replace the work I'd already done on this model which is not entirely accurate simply because I'd gone to so much trouble to make it that I didn't feel like removing them.
Here's a photo of the end result:

And here's the sheet with the rescaled images that fit properly:

If you are planning to model a delivery scheme YAA 727-100 I can let you have a PDF of this that you can print out if you have a suitable printer. But you will still need a sheet of CDS-002 for the other bits and pieces.
Having got over this hurdle the model ia almost completed.
Leigh
- F-27pax
- Posts: 973
- Joined: Fri Apr 18, 2014 11:40 pm
Re: My Boeing 727 project
Great work sir! The 727 is such a great looking airliner. One of my ex-instructors joined some freight hauling crowd flying the last 727's down here in Melbourne. He raved about the 727 saying what a amazing jet it was to fly. I'm guessing the freight crowd was Tasman Cargo?
http://australianaviation.com.au/2010/09/tasman-cargo-727-makes-final-flight/
Cheers
Adam
http://australianaviation.com.au/2010/09/tasman-cargo-727-makes-final-flight/
Cheers
Adam
- Adam the Akrodude
- Posts: 2819
- Joined: Mon Apr 14, 2014 1:02 pm
- Location: 100,124,672,897 Bifrost Rd, Valhalla, Asgard
Re: My Boeing 727 project
This it turning out really nicely, Leigh!
Kev
Kev
- kfutter
- Posts: 442
- Joined: Tue Dec 16, 2014 3:42 pm
Re: My Boeing 727 project
Thanks a lot Adam, I really needed to find out that DHL flew 727 with Australian registrations.  Ignorance is bliss and I was blissfully working away under the assumptions that ten 727s would cover off all the main liveries of 727s flown with VH registrations Now I find that DHL had 727s here with white and Yellow liveries, and reminded me about Polynesian as well. Oh well, more work to be done. Ray, remember how I was looking for one additional 727, now it seems I need another three as well if you have them spare. If I go mad before I finish this project it's all your fault, Adam.
Leigh
Leigh
- F-27pax
- Posts: 973
- Joined: Fri Apr 18, 2014 11:40 pm
Return to Member's Works in Progress
Who is online
Users browsing this forum: Bing [Bot] and 7 guests

