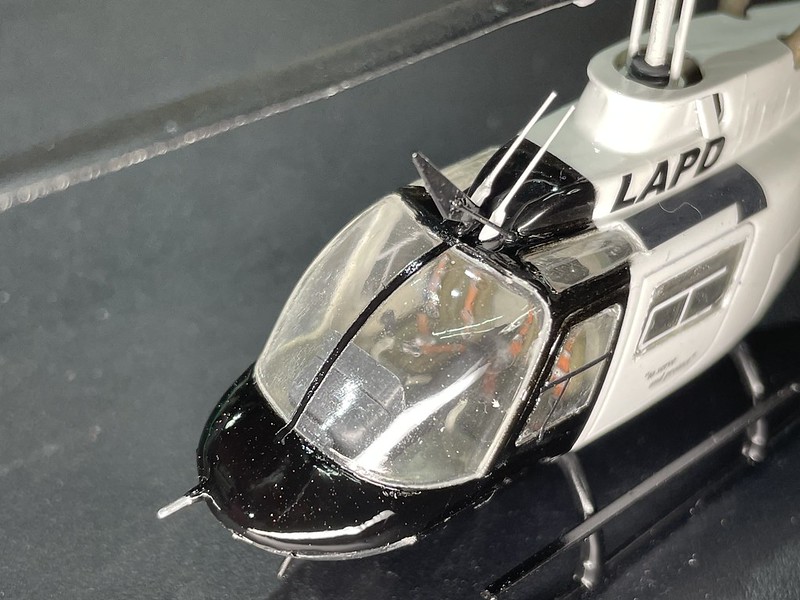
1/72 Italeri Bell 206 Jetranger

Show us what's on the bench

1/72 Italeri Bell 206 Jetranger

Postby hrtpaul » Sun Mar 06, 2022 8:36 pm

I finally started this for the ACAM table at Model Expo later in the year. I've also got an Airfix Seaking to do but I'd rather finish one kit for the table than none at all.

Image

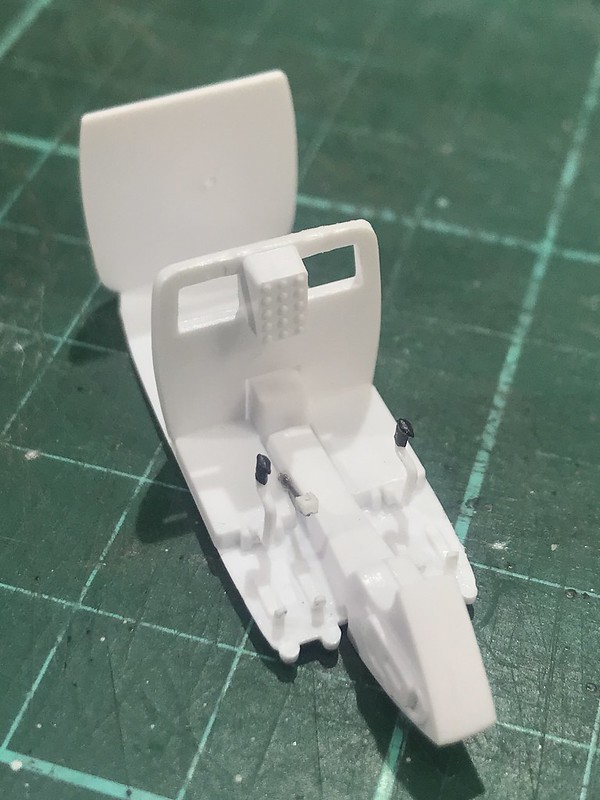
As is typical with a lot of Italeri kits, the fit and detail isn't much to write home about. Let's not even mention the scale half inch rivets that cover the outside. I started with the cockpit just for something completely different. As it's able to be seen through the big windsreen and chin bubbles, some extra detail was required. I made a collective lever from piano wire and scrap plastic. Given how small the kit is it will do. I added anti-torque pedals but as usual, after fitting them I found that they should've been inverted 'L' shaped instead :? :? :? I'm not sure I can be bothered changing them. I've got till I close up the fuse to decide. I also added some seatbelts to the front seats cos they were a little bland to say the least.

Dodgy anti-torque pedals
Image

Collective Lever
Image

Image

Toothpick for scale
Image

Shows how small the kit really is
Image

Image

The cockpit all done
Image

Image

Image

Image

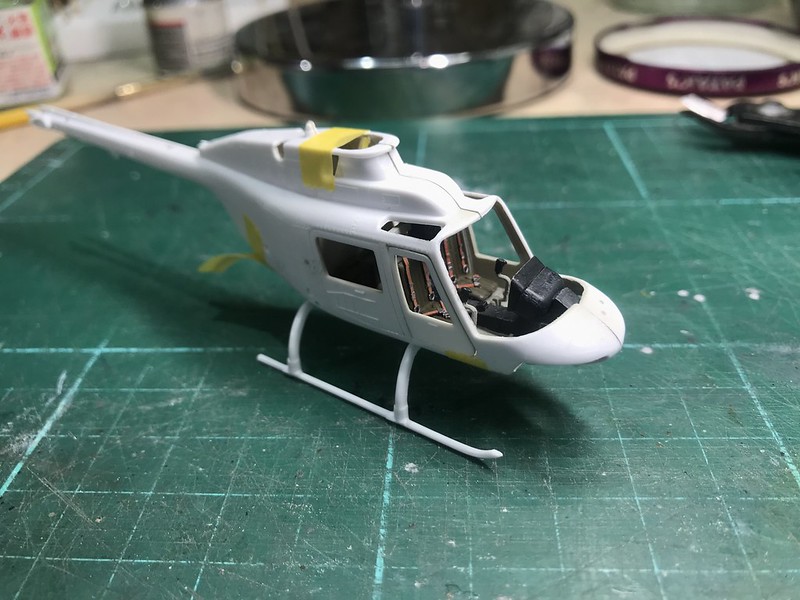
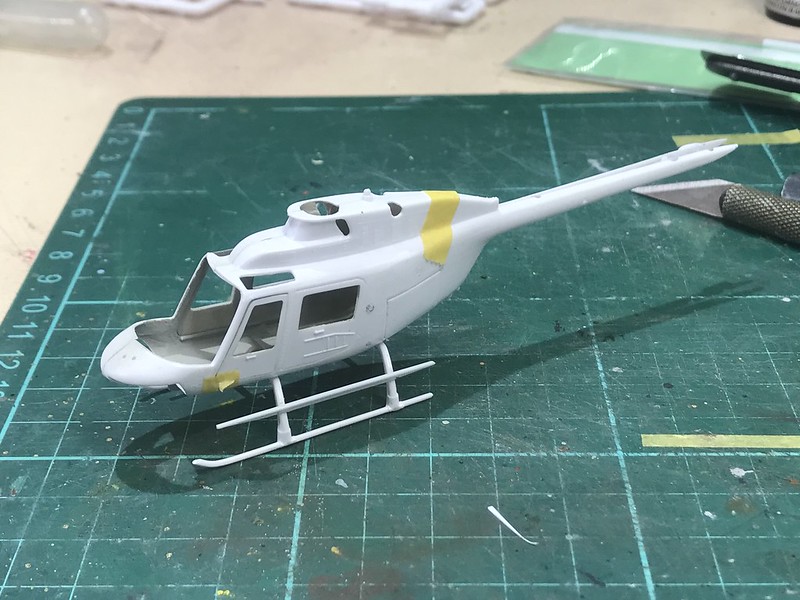
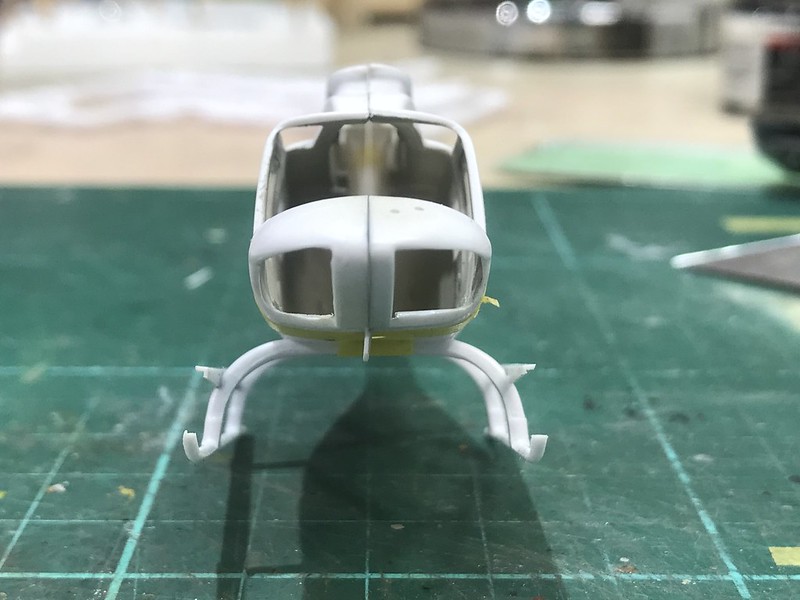
See what I mean about the fit :o :o :o Gonna have to fill in those gaps where the skids mount

Image

The cockpit fitted temporarily. I think it looks pretty cool.
Image

Image

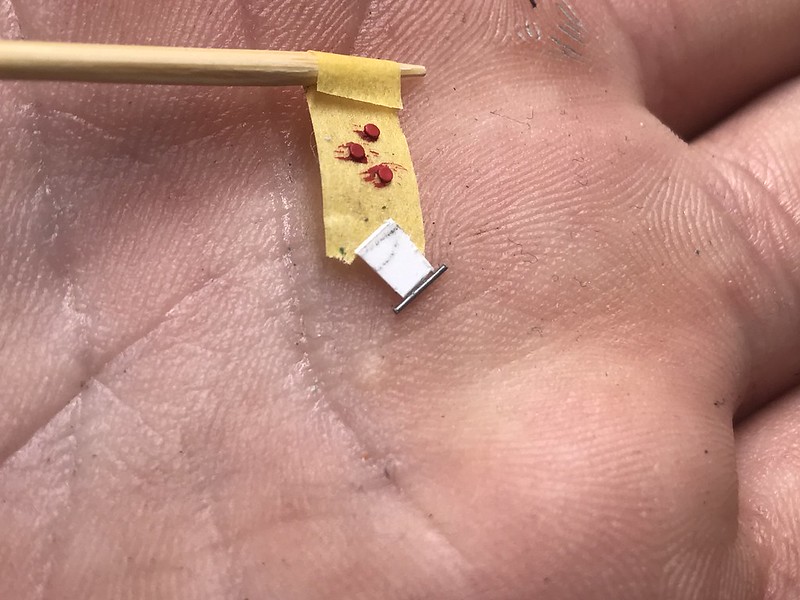
There are some holes in the fuselage that needed filling. I used my punch and die sets to make circles to fill them in but I forgot to take a pic so you'll have to believe me. The upper hole behind the rear door in this pic is where the fuel filler cap is. So some muppet decided to drill the hole a bit bigger, blanked it off inside and made some .9mm discs for the fuel cap. They have since been painted red.
Image

Image

So that's where I'm up to so far. It's no wonder I take forever to finish anything given I can't help myself putting little extra stuff in. I am contemplating making the read windows taller as they aren't correct in the kit. That'll require making windows with clear resin which I have never done before so I'm not sure if I'm brave enough for that.
Head A/CAM Phantom Phanatic, Shit Stirrer and Karma Bus Driver toot fkn toot :twisted:
hrtpaul
 
Posts: 4165
Joined: Sat Apr 12, 2014 10:44 am
Location: Like I'm gonna tell you lot

Re: 1/72 Italeri Bell 206 Jetranger

Postby RayS » Mon Mar 07, 2022 9:28 pm

That is a nice start Paul, I know what you mean about the enhancements :-)

It sure is small, I have one to do as an Army bird and had played around with fit a while back. That cockpit looks great BTW
Ray

Image
User avatar
RayS
 
Posts: 2200
Joined: Thu Apr 17, 2014 10:24 am
Location: RAdelaide!... YPAD

Re: 1/72 Italeri Bell 206 Jetranger

Postby F-27pax » Tue Mar 08, 2022 5:45 am

Your cockpit is great and if I didn't know better I'd think it was in /48 if not even larger scale. Good luck with the rest of the model.
F-27pax
 
Posts: 973
Joined: Fri Apr 18, 2014 11:40 pm

Re: 1/72 Italeri Bell 206 Jetranger

Postby hrtpaul » Tue Mar 08, 2022 6:25 am

Cheers guys. I might get back in the model room tonight to do a bit more on it hopefully :)
Head A/CAM Phantom Phanatic, Shit Stirrer and Karma Bus Driver toot fkn toot :twisted:
hrtpaul
 
Posts: 4165
Joined: Sat Apr 12, 2014 10:44 am
Location: Like I'm gonna tell you lot

Re: 1/72 Italeri Bell 206 Jetranger

Postby tor lives » Sat Mar 12, 2022 3:33 pm

Love it!!!!
TOR
tor lives
 
Posts: 4280
Joined: Mon Apr 14, 2014 11:01 am

Re: 1/72 Italeri Bell 206 Jetranger

Postby hrtpaul » Mon Mar 14, 2022 7:27 pm

Got a bit more done today though cos I keep finding little shit to scratch build it's taking a whole lot longer. I've decided not to worry about making the rear windows bigger as the resin is gonna cost me $75 and I can't afford that at the moment :cry: :cry: :cry: FIrstly I laminated some scrap plastic together and made some blocks to fill in the massive holes where the skids attach. Once I have the fuse together and dry, I'll sand them down so the skids will fit without any gaps. When looking at pics of the real chopper I noticed the chopper has had a few different configurations over the years. So that makes things just a little more difficult.

One of the many things that are missing in the kit are the steps on the skids. I bought some .040" angle and scratched some up. I'm pretty happy how they came up and they'll certainly do in this scale.

Image

Image

Image

Image

The searchlight was the next toget some attention. I couldn't just slap it on without adding the wiring harness now could I :lol: :lol: :lol: So a hole was drilled and a bit of copper wire used to make said harness. Following painting, I added a 2mm lense from Red Roo's Little Lenses range for the actual light. Once again I'm happy with the result.

Image

Image

Terry Toothpick gets another run to add a bit of scale to the pics
Image

Once again looking at reference pics I had another cunning plan to make various antennae not included in the kit. For starters some idiot decided that he had to make the 3 VHF Com antennae, 2 in front of the dog house and 1 aft of the exhausts on top. The aft one will be added after the fuse is closed up and all 3 will have the 'whip' parts of the antennae added towards the end of the build. And yes these are f&@%ing tiny LOL

Image

I think this is a UHF Com antenna which I made up out of .010" card and tiny wire as it's in the reference pics. The red discs are the fuel caps. I only need 1 but I made 3 for the fudge factor

Image

There's still 2 VOR antenna to make from thin wire and a plate with 4 homing antenna on the belly but that's for another time. I also got the rotor blades attached to the rotor head. It's coming along slowly but I am fairly happy with where it's up to at the moment :)
Head A/CAM Phantom Phanatic, Shit Stirrer and Karma Bus Driver toot fkn toot :twisted:
hrtpaul
 
Posts: 4165
Joined: Sat Apr 12, 2014 10:44 am
Location: Like I'm gonna tell you lot

Re: 1/72 Italeri Bell 206 Jetranger

Postby hrtpaul » Fri Jun 10, 2022 3:58 pm

I've done a bit more on this of late. Firstly I made some VOR antennas for the aft fuse from thin piano wire and some 1mm plastic discs. I'll fit them after paint as where they go is painted black and they are white. Toothpick for scale.

Image

Image

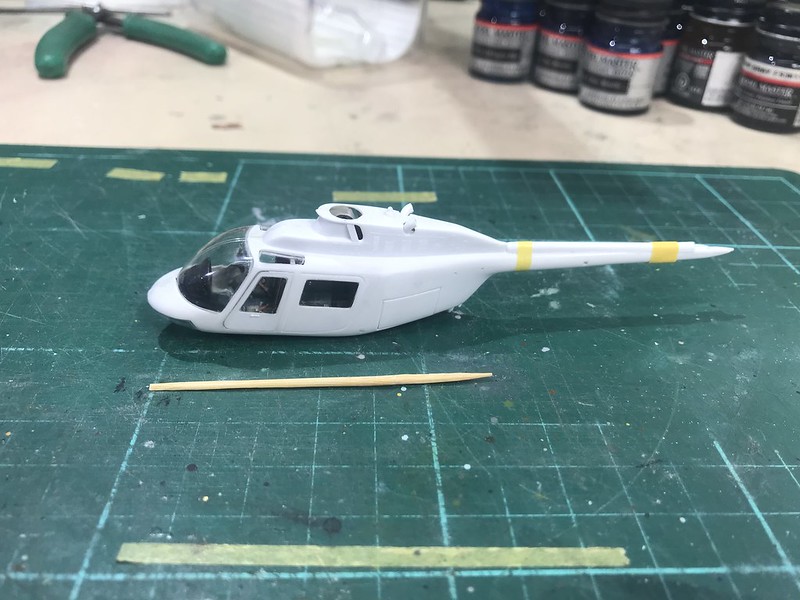
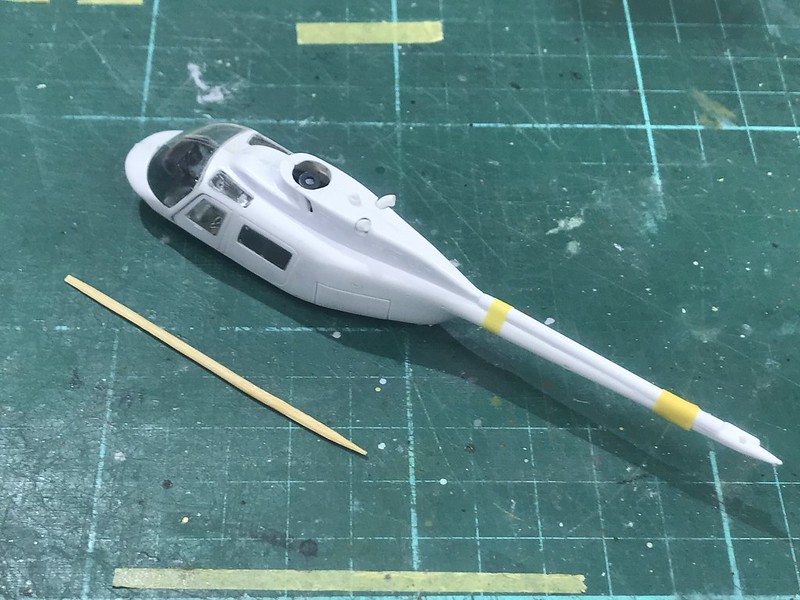
I finally got the fuse together and windows in. The fit on most of the windows was shit so I plugged up the gaps with PVA glue which worked a treat.

Image

Image

Image

Image

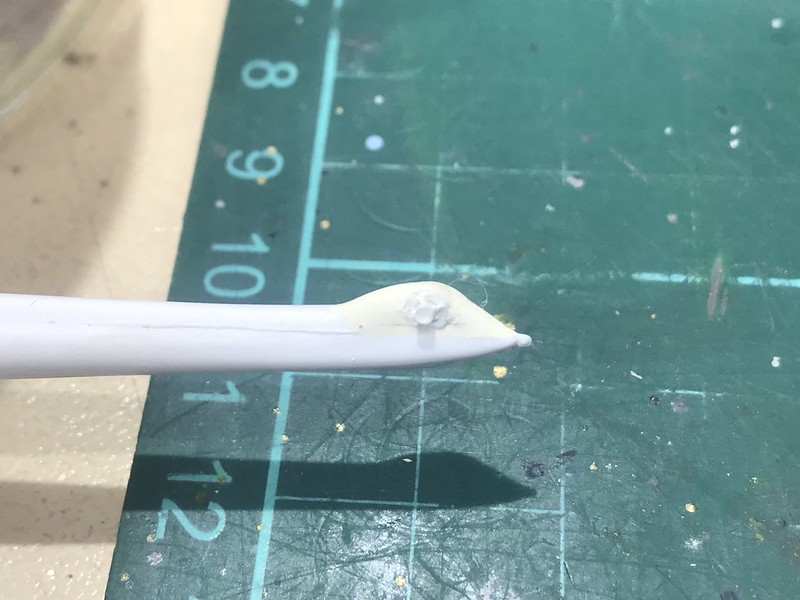
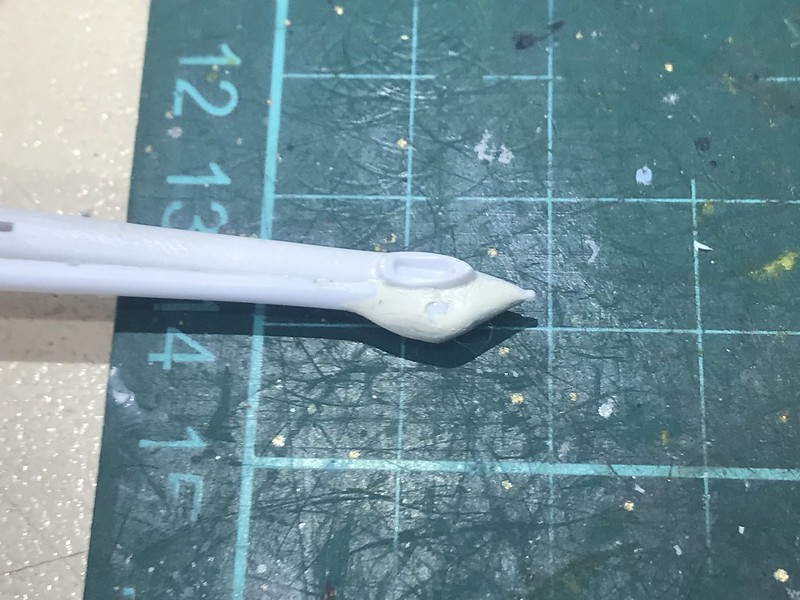
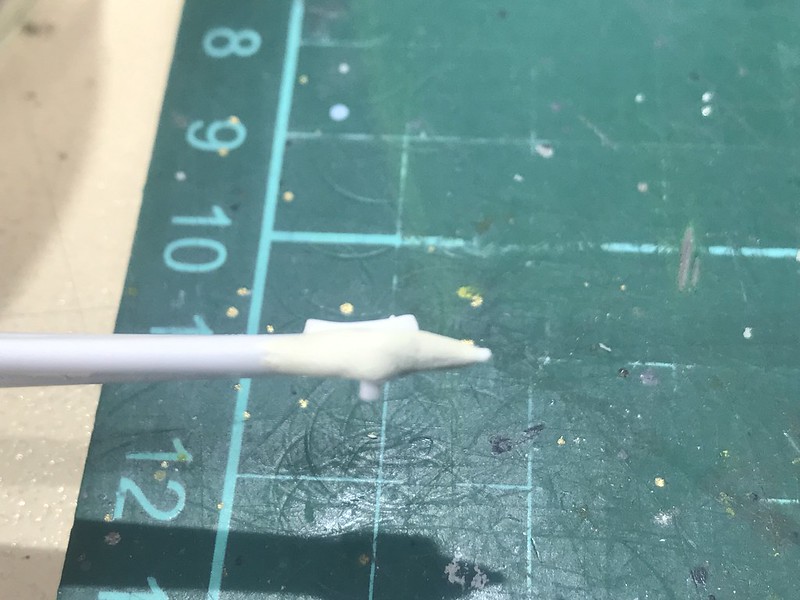
This being essentially a military kit with some civvie decals, Italeri were a tad lazy and didn't include the tail rotor gearbox fairing. I used Milliput for the first time to make one that looks close enough for me.
Image

Image

Image

Once the Milliput is dry, it'll get a tidy up and then the vertical stab can go on. I have also attached the horizontal stabs but didn't get a pic. Anyways that's where I'm at so far in this enjoyable but slow as usual build :)
Head A/CAM Phantom Phanatic, Shit Stirrer and Karma Bus Driver toot fkn toot :twisted:
hrtpaul
 
Posts: 4165
Joined: Sat Apr 12, 2014 10:44 am
Location: Like I'm gonna tell you lot

Re: 1/72 Italeri Bell 206 Jetranger

Postby RayS » Sun Jun 12, 2022 11:23 am

Nice detailing work Paul
Ray

Image
User avatar
RayS
 
Posts: 2200
Joined: Thu Apr 17, 2014 10:24 am
Location: RAdelaide!... YPAD

Re: 1/72 Italeri Bell 206 Jetranger

Postby hrtpaul » Mon May 06, 2024 11:24 pm

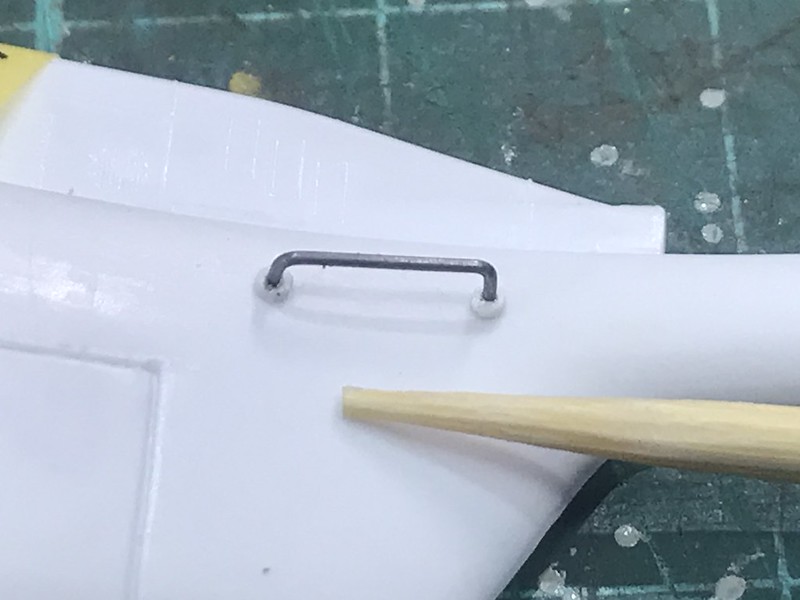
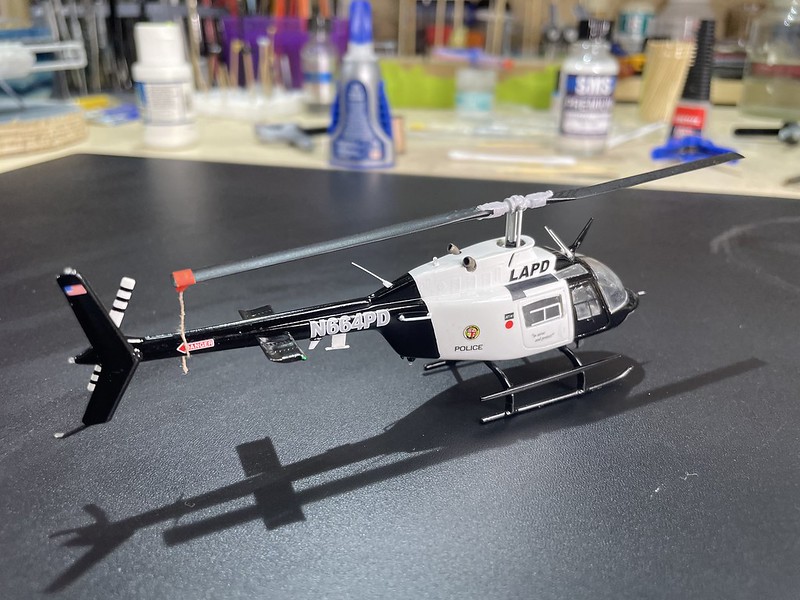
Well it seems it's been a while :o :o :o I may have got my mojo back over the last couple of weeks and have actually finished my first model in over a year. Life gets in the way no matter what people say. Anyways it's good to finish something for a change. Overall I'm reasonably happy with the Jetranger but it is most definitely a 10 footer. It's really only the window fit and finish that I think is a bit shit. Oh and lets not forget the bloody sanding dust inside :evil: :evil: :evil: As is usual for an Italeri kit, it left a little to be desired. Given that between missing bits that make it possible to build what's actually on the box and the average fit, with a bit of scratch building smaller details it turned out ok. I've probably forgotten some but heres some of the things I have added myself:-
*Collective lever
*anti torque pedals
*seatbelts
*VHF, VOR and UHF antennas
*Anti collision beacons and rear nav light from clear sprue
*Homing antennas and associated mounting plate
*wired the searchlight
*skid steps
*wire cutter bracing
*rotor tie down

I have another in the stash that'll be a Kiowa someday. Having learnt a few things, I'll definitely do some things different. I wouldn't mind picking up another one or 2 of these kits but they've been OOP for a long time unfortunately. Following this build I'm gonna be working through the long list of "Shelf of Doomers" to get some of them out of the way before I start anything new. anyways onto the pics :D :D :D

Image

Image

Image

Image

Image

Image

Image

Image

Image

Image
Head A/CAM Phantom Phanatic, Shit Stirrer and Karma Bus Driver toot fkn toot :twisted:
hrtpaul
 
Posts: 4165
Joined: Sat Apr 12, 2014 10:44 am
Location: Like I'm gonna tell you lot

Re: 1/72 Italeri Bell 206 Jetranger

Postby RayS » Wed May 08, 2024 9:03 am

Wow! nice result Paul. Love the extra effort that went into it.
Ray

Image
User avatar
RayS
 
Posts: 2200
Joined: Thu Apr 17, 2014 10:24 am
Location: RAdelaide!... YPAD

Next

Return to Member's Works in Progress

Who is online

Users browsing this forum: No registered users and 8 guests

cron